To help better understand the operation of the 3cMAP (MAP configuration program on PC) together with the RemDroid application (Android™ application for remote control of the MAP) a small practical example will be shown:
Suppose we are a restaurant with a main room (Room 1), a terrace, a reception and the kitchen. In each room there will be a someone in charge: Room 1 Waiter, Terrace Waiter, Receptionist and Chef. Finally we will also have a Manager who will have a general control of all the rooms.
The installer (or advanced user) will carry out the configuration in the 3cMAP program for each profile, assigning each one their password and the corresponding settings for their role and control over the room in which they have permissions.
- Manager Profile: Manager will be in control of Preset changes and certain controls that may compromise the overall operation of the system in case of misuse.
- Room 1 Waiter Profile: This profile will control the volume of the music in Room 1, the microphone level in the presentation area, the volume of the television and open/close the curtains inside the restaurant.
- Terrace Waiter Profile: This profile will control the volume of the music on the terrace, its corresponding television and turn on/off the heaters on the restaurant terrace.
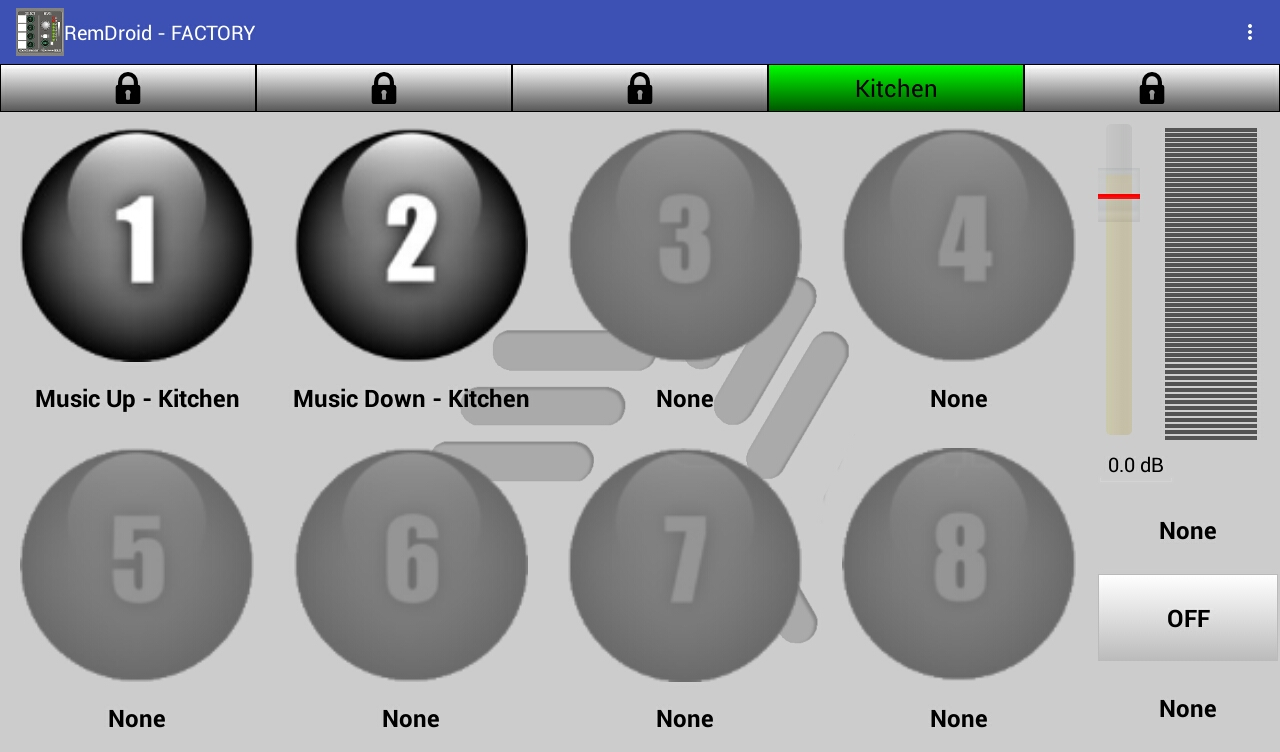
- Kitchen Profile: This profile will control the volume of the kitchen music.
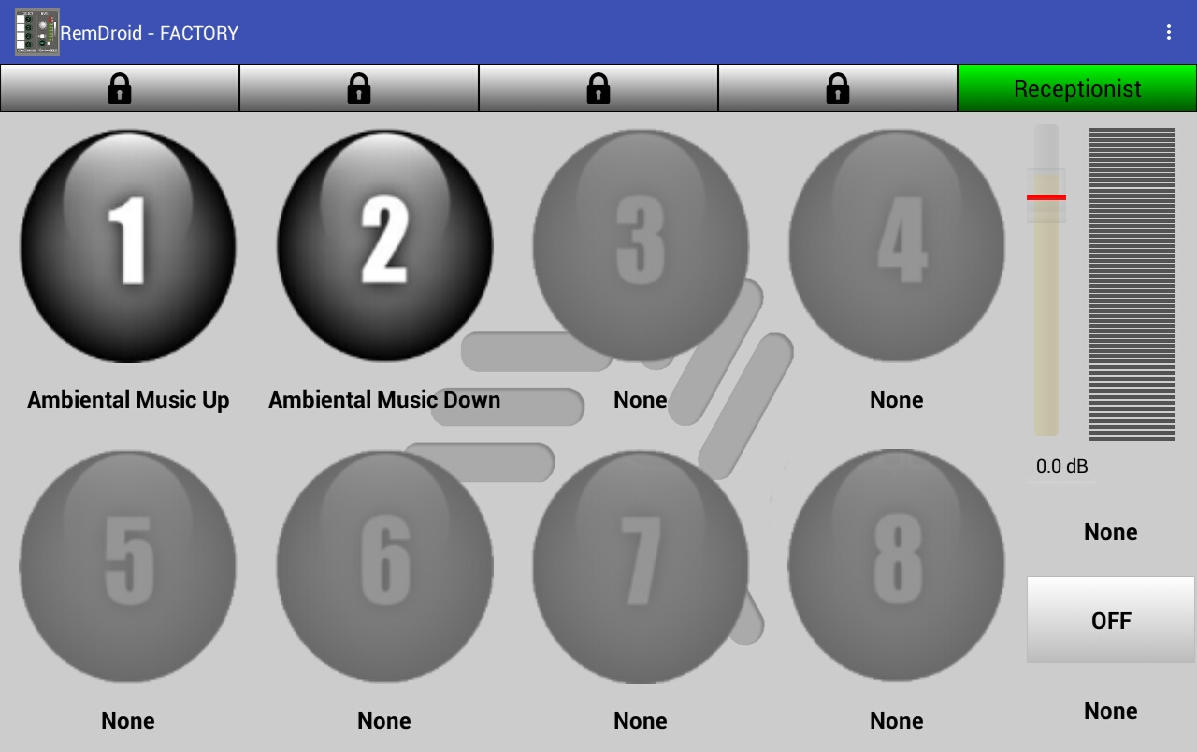
- Receptionist Profile: This profile will control the volume of the background music in the reception.
11.2.1. Manager Profile Settings: 3cMAP
-
First, by pressing the button "..." Profile 1 is assigned the name of Manager.
-
Then with the button "Password" you enter the password to access this profile.
-
Assignment of the action that each button performs:
-
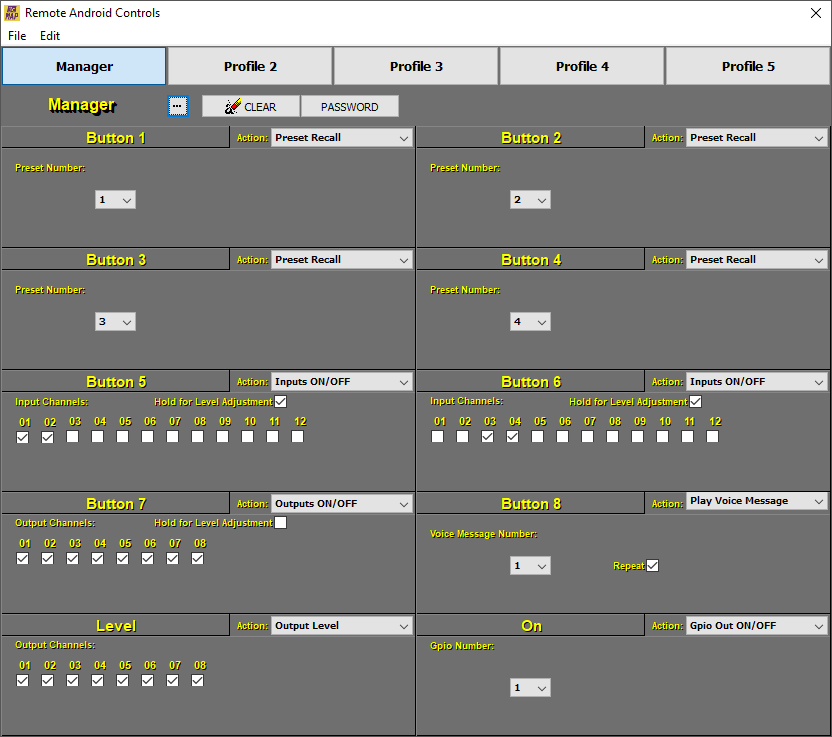
Button 1: Sets the MAP with preset 1. Preset configured to put the MAP in a System Test mode.
-
Button 2: Sets the MAP with preset 2. Preset that sets the MAP to put Room 1 in Football Match mode, it will mute the music volume, increase the volume of the television and lower the intensity of the lights in the room.
-
Button 3: Sets the MAP with preset 3. Preset that sets the MAP to put Room 1 in Music mode, adjust the music volume and turn on the lights in Room 1.
-
Button 4: Sets the MAP with preset 4. Preset that sets the MAP in Presentation mode, will lower the volume of the music and turn on the stage lights.
-
Button 5: Turn the reception music on/off. Keeping this button pressed will enable to modify the volume (This option is enabled by checking the option “Hold for Level Adjustment”).
-
Button 6: Turn the Kitchen music on/off. Keeping this button pressed will enable to modify the volume (This option is enabled by checking the option “Hold for Level Adjustment”).
-
Button 7: Turn the reception music on/off. As the "Hold for Level Adjustment" option is not checked, this button will not give the option to modify the volume.
-
Button 8: It plays the emergency evacuation message in a loop (Looped because we have the Repeat option selected).
-
Level (level adjustment bar): Configured to adjust the overall volume of the system.
-
Button ON: Configured to open or close the curtains inside the Restaurant.
The following image shows how the Manager Profile would be configured with everything mentioned above:
11.2.2. Room 1 Waiter Profile Settings: 3cMAP
-
First, by pressing the button “...” Profile 2 is assigned the name of Room 1 Waiter.
-
Then with the button "Password" you enter the password to access this profile.
-
Assignment of the action that each button performs:
-
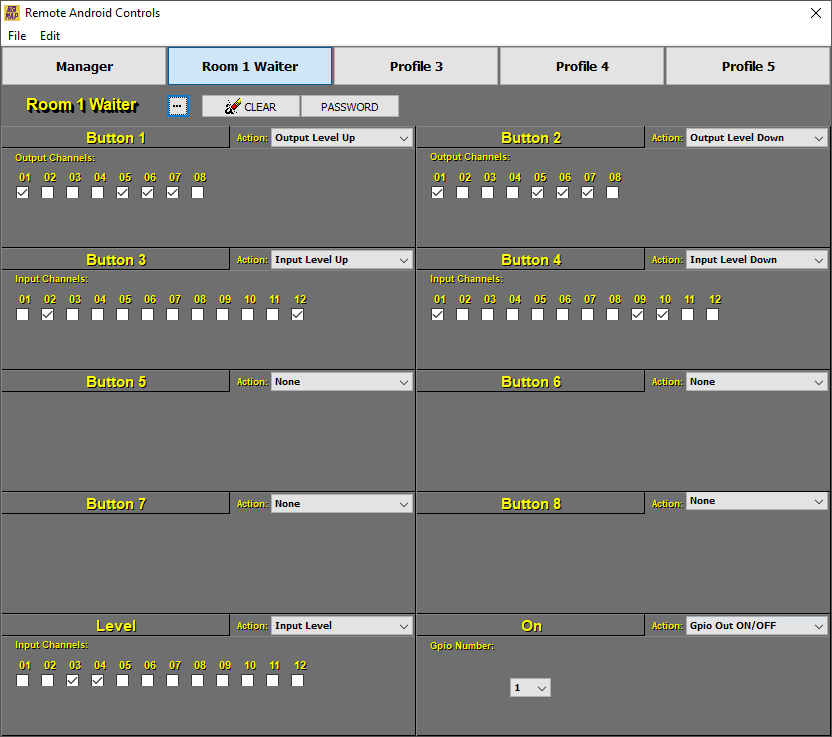
Button 1: Increase the volume of the music in Room 1.
-
Button 2: Lower the volume of the music in Room 1.
-
Button 3: Increase the level of the microphone input in the presentation area.
-
Button 4: Lower the level of the microphone input in the presentation area.
-
Button 5: Unassigned.
-
Button 6: Unassigned.
-
Button 7: Unassigned.
-
Button 8: Unassigned.
-
Level (level adjustment bar): Raise and lower the volume of the television in Room 1.
-
Button ON: Configured to open or close the curtains inside the Restaurant.
The following image shows how the Room 1 Waiter Profile would be configured with all the above:
11.2.3. Terrace Waiter Profile Settings: 3cMAP
-
Firstly, by pressing the button “...” Profile 3 is assigned the name of Terrace Waiter.
-
Then with the button "Password" the password for access to this profile is entered, which will be the same as for the Room 1 Waiter Profile to facilitate changing the area of the waiters according to needs of the restaurant.
-
Assignment of the action that each button performs:
-
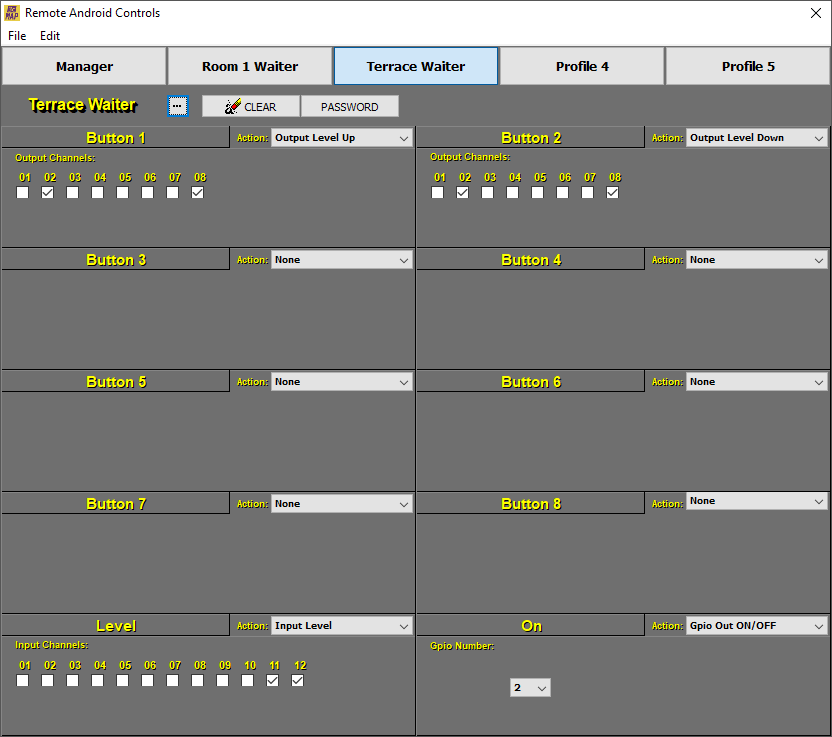
Button 1: Turn up the volume of the music on the Terrace.
-
Button 2: Lower the volume of the music on the Terrace.
-
Button 3: Unassigned.
-
Button 4: Unassigned.
-
Button 5: Unassigned.
-
Button 6: Unassigned.
-
Button 7: Unassigned.
-
Button 8: Unassigned.
-
Level (level adjustment bar): Raise and lower the volume of the TV on the Terrace.
-
Button ON: Configured to turn on or off the heaters of the restaurant terrace.
The following image shows how the Terrace Waiter Profile would be configured with everything mentioned above:
11.2.4. Kitchen Profile Settings: 3cMAP
-
By first pressing the button "..." Profile 4 is assigned the name of Kitchen.
-
Then with the button "Password" you enter the password to access this profile.
-
Assignment of the action that each button performs:
-
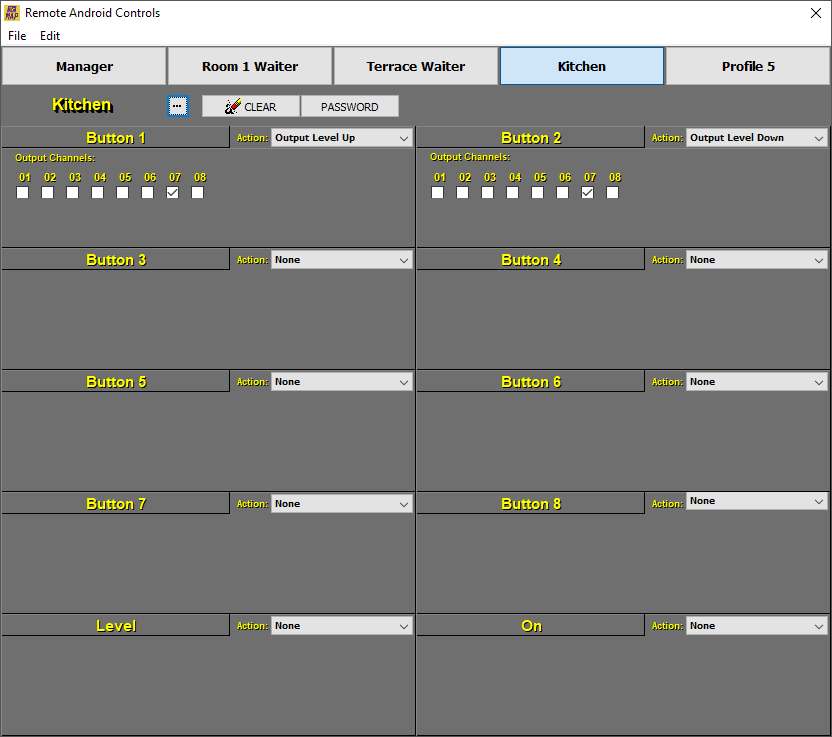
Button 1: Turn up the volume of the kitchen music.
-
Button 2: Lower the volume of the kitchen music.
-
Button 3: Unassigned.
-
Button 4: Unassigned.
-
Button 5: Unassigned.
-
Button 6: Unassigned.
-
Button 7: Unassigned.
-
Button 8: Unassigned.
-
Level (level adjustment bar): Unassigned.
-
Button ON: Unassigned.
The following image shows how the Kitchen Profile would be configured with everything mentioned above:
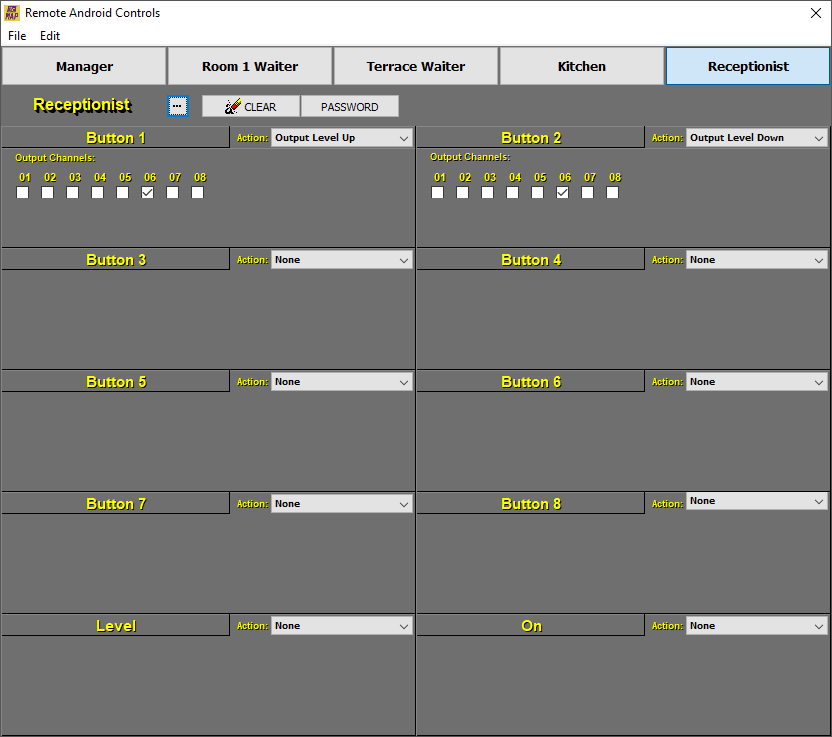
11.2.5. Receptionist Profile Settings: 3cMAP
-
First, by pressing the button "..." Profile 3 is assigned the name of Receptionist.
-
Then with the button "Password" you enter the password to access this profile.
-
Assignment of the action that each button performs:
-
Button 1: Increase the volume of the background music in the Reception.
-
Button 2: Lower the volume of the background music in the Reception.
-
Button 3: Unassigned.
-
Button 4: Unassigned.
-
Button 5: Unassigned.
-
Button 6: Unassigned.
-
Button 7: Unassigned.
-
Button 8: Unassigned.
-
Level (level adjustment bar): Unassigned.
-
Button ON: Unassigned.
The following image shows how the Receptionist Profile would be configured with all of the above:
11.2.6. Configuration and operation of the RemDroid application
After the configuration just explained of the 3cMAP software, when you open the RemDroid application you will see the following:
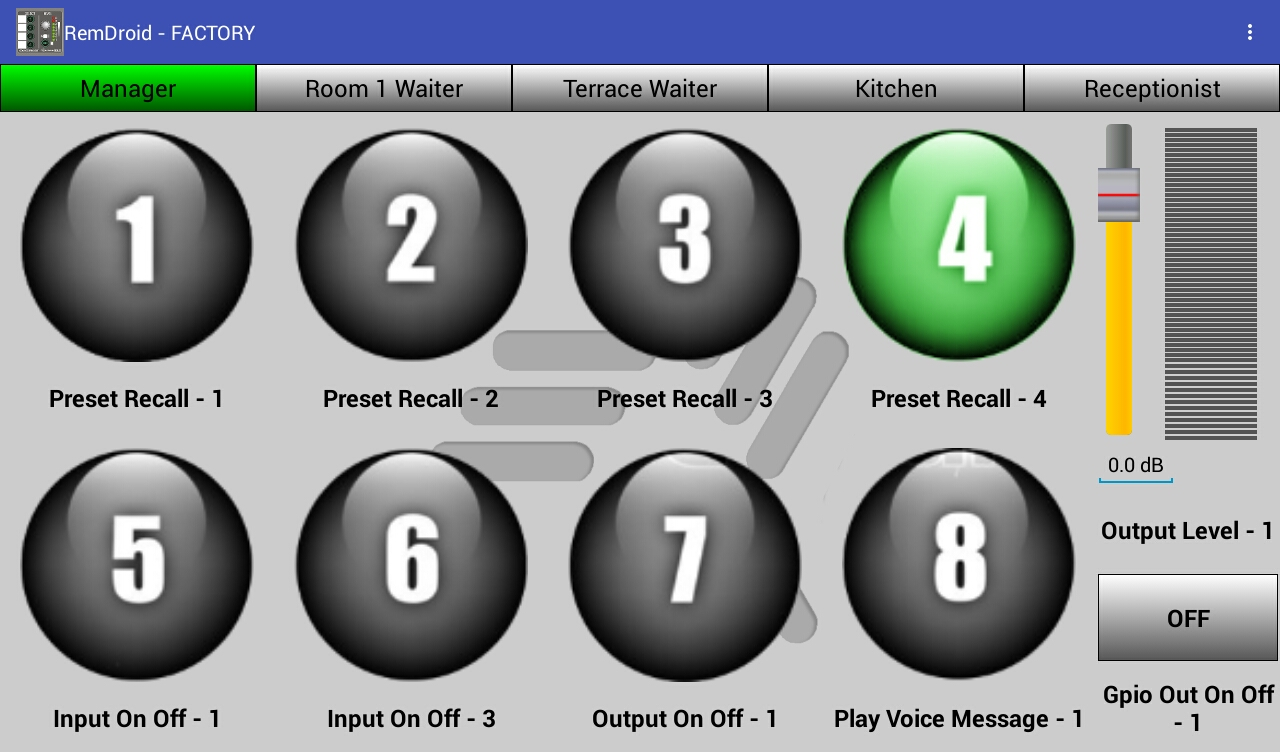
It should be noted that the previous capture has been taken with a configuration of profiles without passwords so that it is more explanatory. Images with the actual representation in the application will be shown later in this guide.
Initially the RemDroid application will assign some default names to the buttons depending on the action they have assigned. Tapping on the name of the button, the application will allow us to modify it to personalize the name.
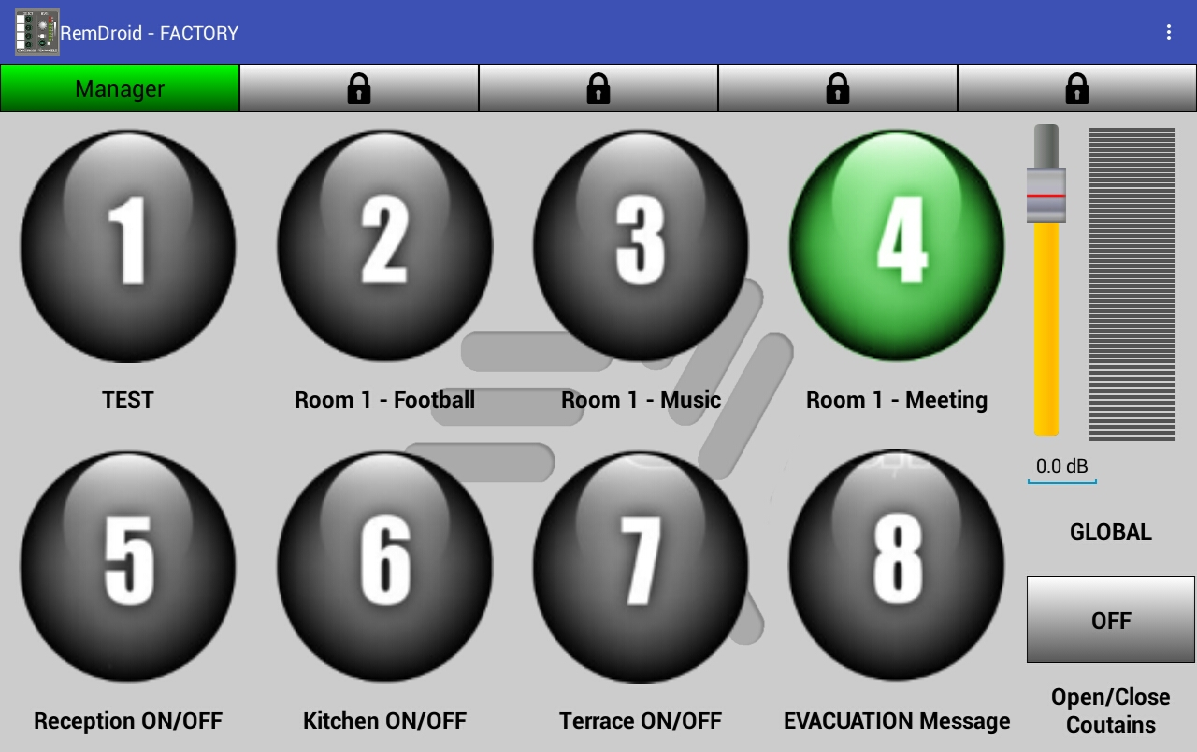
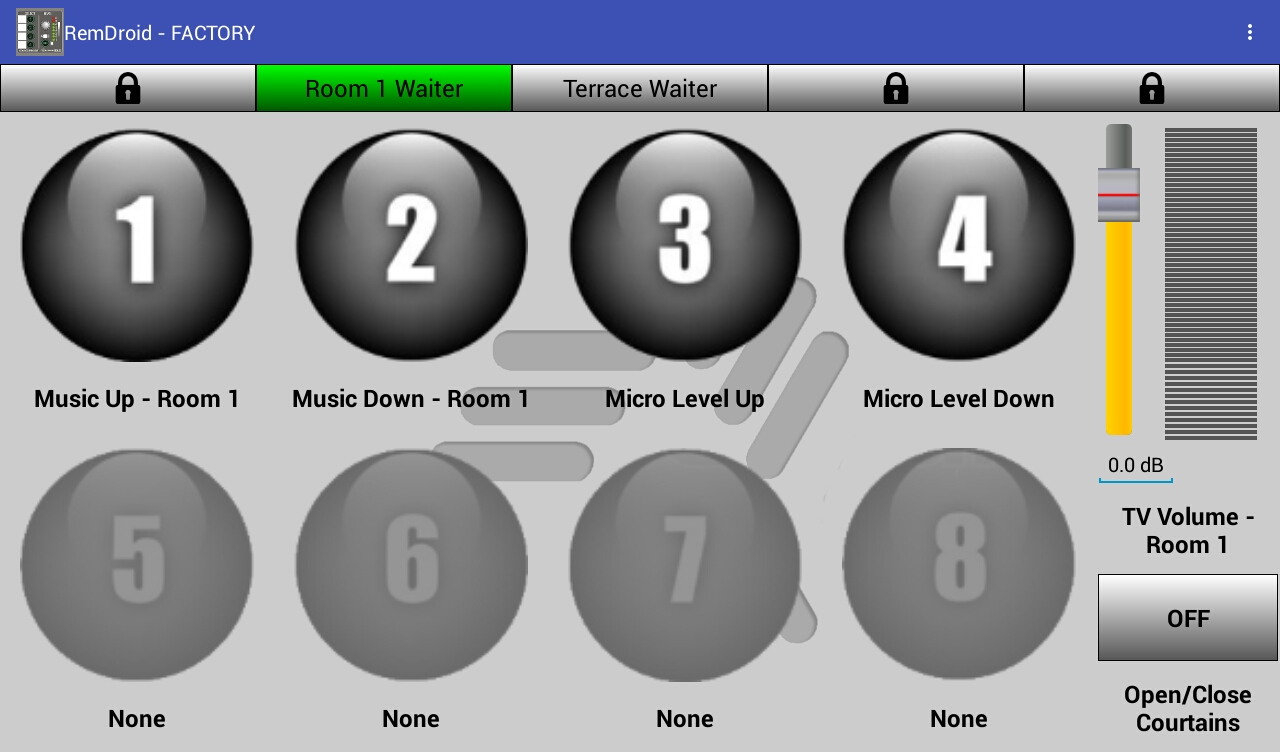
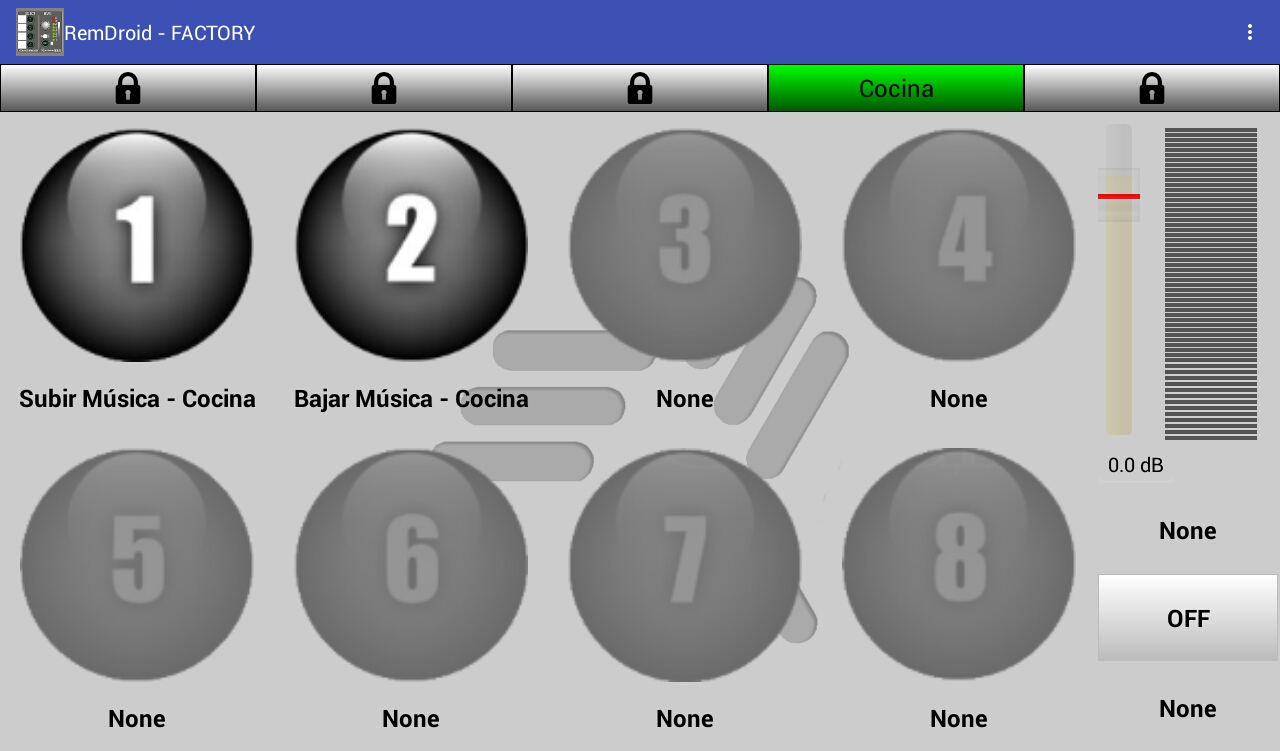
In this way, with all the names already defined and with the configuration of profiles with password, RemDroid will be as follows:
 |
 |
 |
 |
 |
|
As can be seen in the previous images in the profile selection bar, there are certain profiles that instead of the name there is a padlock. This means that this profile has a different password than the one entered when entering the RemDroid application.
To change the profile, press the button “...” (top right) and select the option “Change local access password”. This will allow you to enter the password of the profile you want to access, RemDroid will recognize the password and unlock all the profiles assigned to it. It can be seen that the profiles of Room 1 Waiter and Terrace Waiter share the same password for the above explained.
In the previous images you can see that some buttons have a green color, this depending on the action assigned to them in the 3cMAP has different meanings:
Assigned Action = Preset Recall:
-
Solid green: Indicates that the MAP is fully configured with the assigned Preset.
-
Flashing green: Indicates that the MAP is configured with the assigned Preset but that some parameter has been modified (such as changing the music volume).
Assigned Action = Inputs/Outputs/Gpio Outputs ON/OFF:
-
Solid green: Indicates that these Inputs/Outputs/Gpio Output are active.
-
Flashing green: When the button is held down to adjust the level of the Inputs/Outputs/Gpio Output, said button will start flashing and the LEVEL bar will change the level of said element (This will only happen if the option of “Hold for Level Adjustment” is activated). Once the level is adjusted to the desired level, by pressing the button previously held, everything will return to its normal operating mode.
